1. 概述
在本教程中,我们将学习如何配置Spring Security以允许在Spring Boot 3应用程序中访问Swagger UI。
Swagger UI是一种用于记录API的工具,它提供了一个用户友好的界面来与API和测试端点进行交互。但是,当我们在应用程序中启用Spring Security时,由于安全限制,Swagger UI变得无法访问。
我们将探讨如何在Spring Boot 3应用程序中设置Swagger并配置Spring Security以允许访问Swagger UI。
2. 代码设置
让我们从设置应用程序开始,我们将添加必要的依赖项并创建一个简单的控制器。我们将配置Swagger并测试Swagger UI是否不可访问,然后我们将通过配置Spring Security来修复它。
2.1 添加Swagger和Spring Security依赖
首先,我们将在pom.xml文件中添加必要的依赖项 :
<dependency>
    <groupId>org.springdoc</groupId>
    <artifactId>springdoc-openapi-starter-webmvc-ui</artifactId>
    <version>2.6.0</version>
</dependency>
<dependency>
    <groupId>org.springframework.boot</groupId>
    <artifactId>spring-boot-starter-security</artifactId>
</dependency>
<dependency>
    <groupId>org.springframework.boot</groupId>
    <artifactId>spring-boot-starter-web</artifactId>
</dependency>
springdoc-openapi-starter-webmvc-ui是一个封装了Swagger的Springdoc OpenAPI库,它包含在应用程序中设置Swagger所需的依赖和注解。
spring-boot-starter-security依赖为应用程序提供Spring Security,当我们添加此依赖项时,Spring Security默认启用并阻止对所有URL的访问。
创建API需要spring-boot-starter-web依赖项。
2.2 控制器
接下来,让我们创建一个具有端点的控制器:
@RestController
public class HelloController {
    @GetMapping("/hello")
    public String hello() {
        return "Hello, World!";
    }
}
当我们调用hello端点时,它会返回字符串“Hello, World!”。
3. 配置Swagger
接下来,让我们配置Swagger,我们将设置配置以启用Swagger并向控制器添加注解。
3.1 配置类
为了配置Swagger,我们需要创建一个配置类:
@Configuration
public class SwaggerConfig {
    @Bean
    public GroupedOpenApi publicApi() {
        return GroupedOpenApi.builder()
                .group("public")
                .pathsToMatch("/**")
                .build();
    }
}
在这里,我们创建了一个SwaggerConfig类并定义了一个publicApi()方法,该方法返回一个GroupedOpenApi Bean,此Bean将与指定路径模式匹配的所有端点分组。
我们在方法中定义了一个public组,并将路径模式指定为”/**”,这意味着应用程序中的所有端点都将包含在此组中。
3.2 Swagger注解
接下来我们给控制器添加Swagger注解:
@Operation(summary = "Returns a Hello World message")
@GetMapping("/hello")
public String hello() {
    return "Hello, World!";
}
我们在hello()方法中添加了@Operation注解来描述端点,此描述将显示在Swagger UI中。
3.3 测试
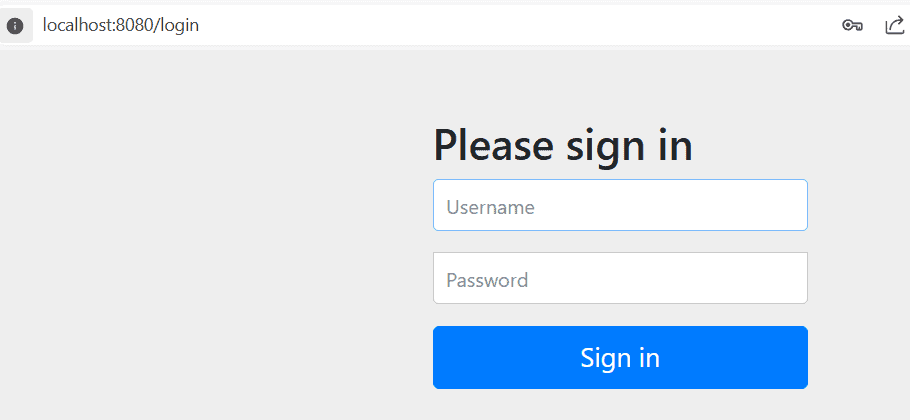
现在,让我们运行应用程序并测试Swagger UI。默认情况下,Swagger UI应该可以通过http://localhost:8080/swagger-ui/index.html访问:

在上图中,我们可以看到Swagger UI无法访问。相反,系统提示我们输入用户名和密码。Spring Security希望在允许访问URL之前对用户进行身份验证。
4. 配置Spring Security以允许Swagger UI
现在,让我们配置Spring Security以允许访问Swagger UI。我们将介绍两种实现此目的的方法:使用SecurityFilterChain和WebSecurityCustomizer。
4.1 使用WebSecurityCustomizer
从Spring Security中排除路径的一个简单方法是使用WebSecurityCustomizer接口,我们可以使用此接口在指定的URL上禁用Spring Security。
让我们在配置类中定义一个WebSecurityCustomizer类型的Bean:
@Configuration
public class SecurityConfig {
    @Bean
    public WebSecurityCustomizer webSecurityCustomizer() {
        return (web) -> web.ignoring()
                .requestMatchers("/swagger-ui/**", "/v3/api-docs*/**");
    }
}
@Configuration注解将该类标记为配置类,接下来,我们定义一个WebSecurityCustomizer类型的Bean。
这里,我们使用Lambda表达式来定义WebSecurityCustomizer实现,我们使用ignoring()方法从安全配置中排除Swagger UI URL/swagger-ui/**和/v3/api-docs*/**。
当我们想忽略某个URL上的所有安全规则时,这很有用。仅当URL是内部的且不公开时才建议这样做,因为没有安全规则适用于它。
4.2 使用SecurityFilterChain
覆盖Spring Security默认实现的另一种方法是定义SecurityFilterChain Bean,然后我们可以在提供的实现中允许Swagger URL。
为此,我们可以定义一个SecurityFilterChain Bean:
@Bean
public SecurityFilterChain filterChain(HttpSecurity http) throws Exception {
    http.authorizeHttpRequests(
            authorizeRequests -> authorizeRequests.requestMatchers("/swagger-ui/**")
                    .permitAll()
                    .requestMatchers("/v3/api-docs*/**")
                    .permitAll());

    return http.build();
}
此方法配置安全过滤器链以允许访问Swagger UI URL:
- 我们使用authorizeHttpRequests()方法来定义授权规则。
- requestMatchers()方法用于匹配URL,我们指定了Swagger UI URL模式/swagger-ui/**和/v3/api-docs*/**。
- /swagger-ui/**是Swagger UI的URL模式,而/v3/api-docs*/**是Swagger调用来获取API信息的OpenAPI文档的URL模式。
- 我们使用permitAll()方法允许无需身份验证访问这些URL。
- 最后,我们返回了http.build()方法来构建安全过滤器链。
这是建议使用的方法,允许对某些URL模式进行未经身份验证的请求。这些URL的响应中将包含Spring Security标头。但是,它们不需要用户身份验证。
4.3 测试
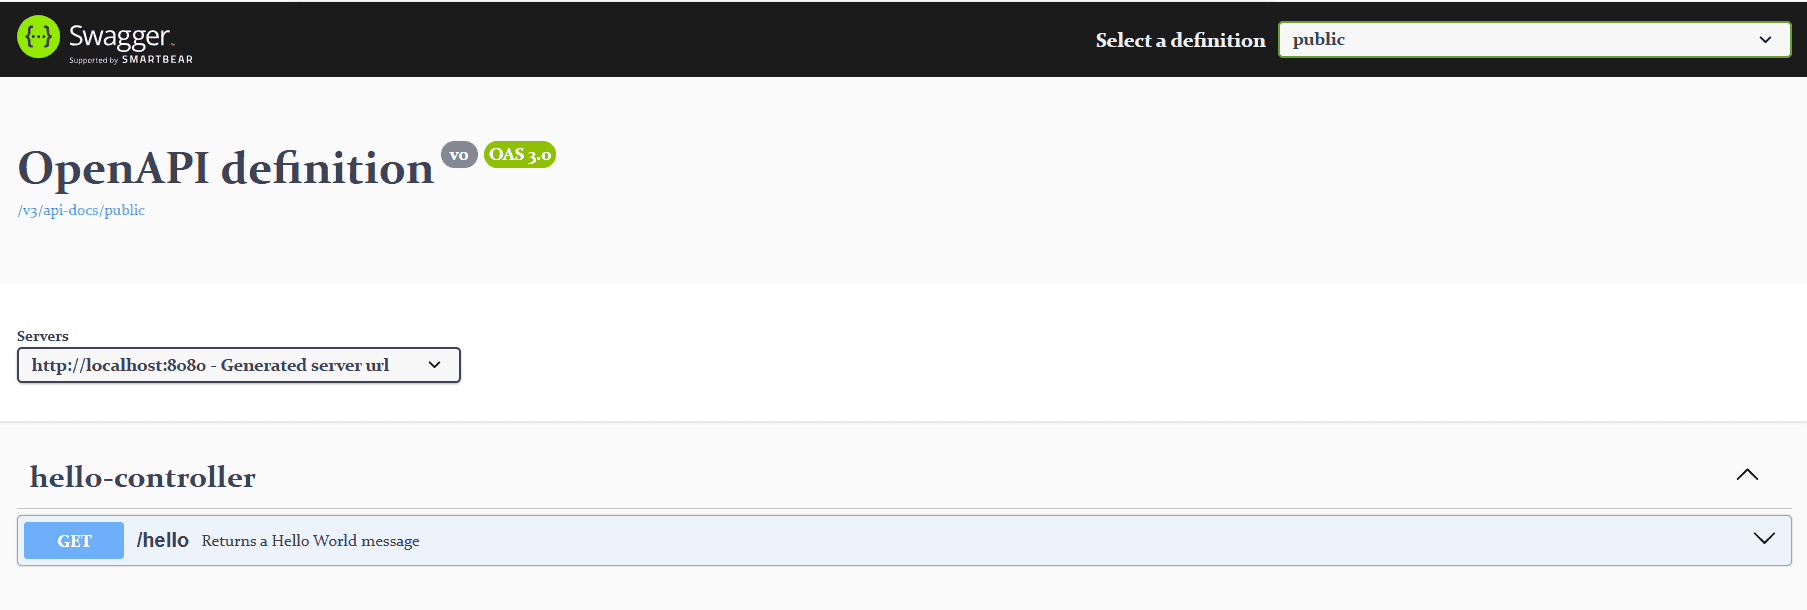
现在,让我们运行应用程序并再次测试Swagger UI,现在应该可以访问Swagger UI。

我们可以看到,该页面可以访问,并且包含有关我们的控制器端点的信息。
5. 总结
在本文中,我们学习了如何配置Spring Security以允许在Spring Boot 3应用程序中访问Swagger UI,我们探讨了如何使用SecurityFilterChain和WebSecurityCustomizer接口从Spring Security配置中排除Swagger UI URL。
Post Directory
